Tuesday 25 December 2012

The Bees at Home: Christmas Edition

It's Christmas Day and we've got a very special post for you! We love showing you what we've been working on at home, and have a chance to hear what you've been up to! These are just some of the handmade Christmas gifts the Bees have put together this year. There's lots of variety, and hopefully some inspiration for you, as we head into a new year full of new crafting opportunities!

First off, Hollie is so very sweet, and made these pin cushions for all her lady friends. They're not your average tomato pin cushions, though - these are heirloom tomatoes. Big difference. They're just so awesome! She found the tutorial in her Martha Stewart Encyclopedia of Sewing and Fabric Crafts.


She's also taking care of a Christmas wish this year. Her brother-in-law has dreams of knit pants, and Hollie (in typical Hollie style) made it happen. Who knew these were even possible?! But I guess with Hollie as Santa, and with the help of a knitting machine...anything is possible.


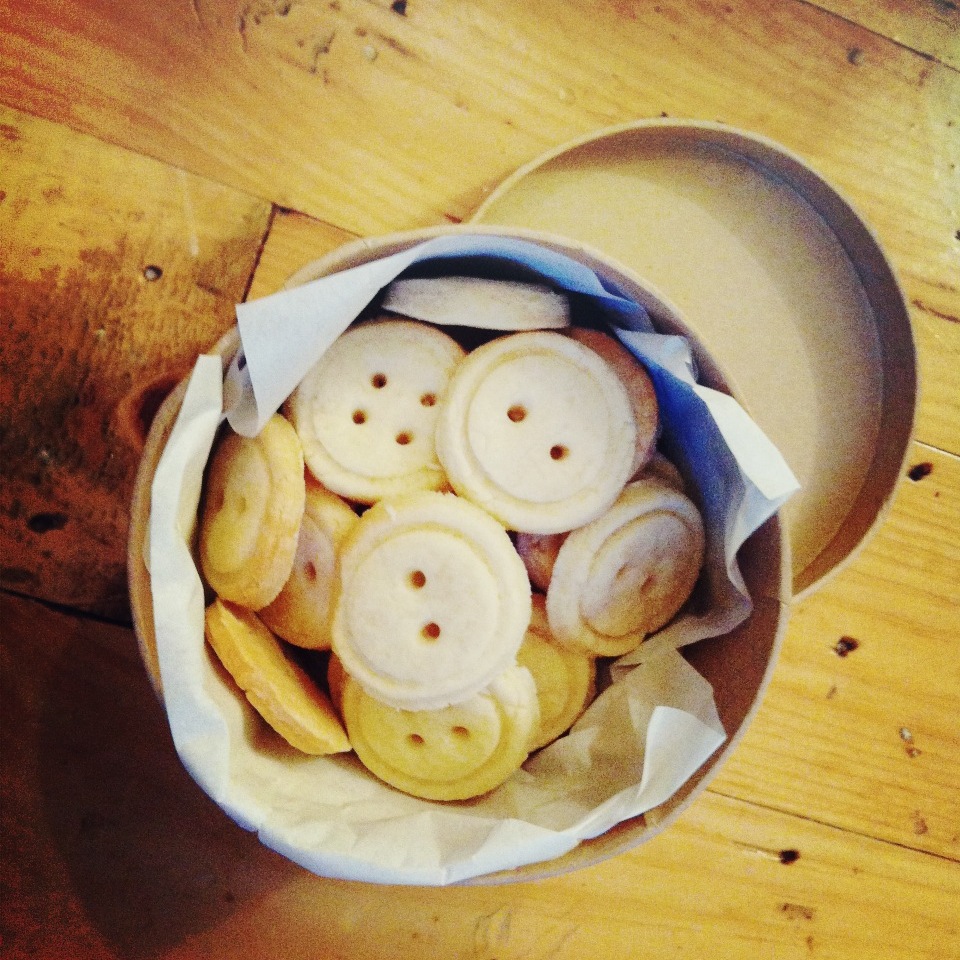
Mel, one of our dear Scout Bees, was a busy baker this Christmas. She made button cookies and teabag cookies for her mom, and adorable Christmas cookie packs for her neighbors!


Jen had all kinds of holiday parties to attend on the weekend, and put together these amazing gifts for the hosts - she picked up mini potted cypress trees (available from i fiori on James North), and sewed little fabric containers for them. I got to help her decide on fabrics, and with all the amazing options at Needlework, it was a very difficult process of elimination. They turned out so nice, Jen! 


Also...coasters! These are an amazing option for a little handmade gift. You can use your extra scraps, or pick up that awesome fabric you've had your eye on, and just whip them up! Below are the beautiful coaster sets that Kate made!


This Christmas something dawned on me. It hit me that my husband and I get stockings full of treats every year, but his parents don't get stockings! And what's more fun than a stocking!? Kevin's dad loves the Seattle Seahawks, so I used some fabric and Steam-a-Seam to make a little team logo. Who thought my craft adventures would ever turn sporty? Anyways, they turned out really cute and it was so much fun to pick out the fabrics, and to fill them up with goodies from some of our favorite local shops.


Lastly, it's not done until it's ready to put under the tree! Jenna, another one of our dear Scout Bees, hand-carved some stamps and created her own gift wrap with kraft paper and white ink. So simple and pretty!


Making Christmas gifts is such a satisfying experience. You spend a lot of time working on them (at the sewing machine, in the kitchen, wherever) which means you can literally pour so much love into the gift you're giving, and as you make it, you begin to feel more and more grateful for the person you're giving it to. At the same time, receiving a gift that someone has made by hand is such an honor. The idea that someone has chosen fabric, cut, sewn, or mixed ingredients and waited patiently for the oven to finish - all with you in mind, is very humbling. Not to mention, handmade gifts can be completely personalized, and often very cost-efficient. It's just rewarding all around!

If you've posted about your handmade gifts, we'd love to see them! Just post the link in the comments below. Merry Christmas, everyone! :)

Thursday 20 December 2012

Just in Time for Christmas...

Christmas is only five sleeps away! Or if you're on track with your Advent calendar, it's only five chocolates away! If you're looking for a last-minute gift for someone special, there's really nothing better than a beautifully wrapped package of handmade treats. This is the perfect gift idea for a neighbor, a co-worker, or your favorite barista!


We got together a few weeks ago and made an absolutely amazing Christmas treat - holiday brittle! This is not your average peanut brittle. It's flavored with cardamom, which is the same spice used in chai tea. In other words, the taste reminds you of cozy, warm holiday deliciousness. And instead of peanuts, we used pepitas which are hulled pumpkin seeds (and it's just a really fun word to say). This brittle is super yum, and we promise it will be a huge hit with your gift recipients!

We used this recipe, and have no fear - we found the whole process very simple.

Ingredients needed:
2 cups of sugar
4 oz. of unsalted butter
1/3 cup of light corn syrup
1 cup + 2 tablespoons water
Have the following items ready and close by:
1/2 teaspoon of baking soda
2 teaspoons of coarse sea salt
1 teaspoon of ground cardamom
1 1/2 cups of raw, unroasted pepitas (we got these from the Hamilton Farmers Market)
(mix these last two ingredients together)

Have two baking sheets ready, lined with silicon mats. Just mix the sugar, butter, corn syrup, and water over medium-heat until it thickens and becomes "medium-golden-amber". Now, I'd say the trickiest part of this recipe is knowing what "medium-golden-amber" is, but go with your gut. The recipe said it takes 10-15 minutes, but I'd say it took more like 25 minutes before we could confidently say it was the right color.


Take a swig of your warm apple cider - this is the part where things get real. Remove from heat, then immediately stir in baking soda, followed by sea salt (beware of crazy bubbles!), followed by the cardamom/pepita mixture. Quickly pour the mixture on your baking sheets, and try to spread it evenly. Hurry hurry, as it will start to harden immediately! As you can see, we had all hands on deck for this part...


Do some crafts while you let it cool - it takes about 45 minutes to an hour to fully cool. Then go ahead and break it up into pieces! You can store for two weeks in an airtight container, and its very helpful to use parchment paper between the pieces to keep them from sticking. And don't forget about the pretty packaging!

Oh, last thing - Kate really loves cats, and apparently, while we were making brittle, I really liked taking pictures of Kate with cats. I contemplated writing a post specifically about Kate and her love of cats, but I thought I'd spare you...


Merry Christmas, friends!

Thursday 13 December 2012

Wreath Making

Making my own fresh wreath is a project that I've been thinking about attempting for the last couple of years, and I'm so grateful to be a part of the Beehive because I know that they are down for any crafty endeavour! It's always more fun trying new things with friends.


We set a date and ordered all of the greenery in advance from I Fiori on James Street North. Owner Beverly was enthusiastic about helping us and sourced us absolutely beautiful boxwood and rosehip from Ontario and white pine, black cedar and seeded eucalyptus from British Columbia. She provided us with wreath frames and floral wire, and most importantly, a little advice in wreath-making.

Around the holidays I Fiori is usually bursting with fresh greens and would most likely have enough if you're looking to make one for yourself, but if you're looking for something specific or need a little more than what she has in stock, Beverly is always willing to help. It's such a gorgeous, well-curated shop.


We settled around my harvest table one evening with pruning shears, red wine and our task at hand. The process was much easier and satisfying than any of us had expected. We cut our greens into smaller pieces, bunched them together in pleasing arrangements and secured them with wire. We then secured all the smaller bunches in the same direction to the wreath frame with wire until we had covered the circular shapes.


With such an assortment of fresh materials, all of us ended up with completely unique wreaths. We couldn't stop oohing and aahing over everyone's creations. It was a such a cozy holiday craft for us all to indulge in. Now that we've familiarized ourselves with it, I imagine making one every year, maybe even making enough for gifts because a fresh wreath is so lovely and so festive. Next year, perhaps we'll attempt to make our own frames from willow branches, even!


I used only boxwood, rosehip and seeded eucalyptus in mine, and was surprised to discover that my front door had a nail in it that was perfectly placed for hanging a wreath. I attatched some twine, and voila! I'm ready for the holidays.